Recall in my earlier pizza article that I usually make pizza without red sauce and without meat?
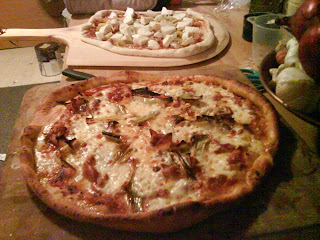
Well, I went ahead and tossed those rules out and made a pair of pizzas with a red sauce made from sweet heirloom tomatoes. To top the pies, I went with leeks, and paired with that was pancetta, which is a higher quality of cured pork belly very similar to bacon:
The sauce was very easy. Basically, I crushed and minced four cloves of garlic, added two tablespoons of olive oil to a two quart pot, and let the garlic fry for a little on medium heat. I roughly cut up the heirloom tomatoes and added them to the pot with a cup of dry white wine, and brought that up to a boil for a bit to reduce the alcohol out. Once that was done, I put a teaspoon of dried basil, a teaspoon of dried oregano, a teaspoon of salt, and a teaspoon of sugar in the mix, and topped it off with a bay leaf, and left it to simmer on a very low heat for 45 minutes.
While that was simmering, I worked together a crust. It was similar to the one I made before, but with semolina flour instead of whole wheat in a 1:2 ratio to all purpose. Instead of rosemary, I worked in oregano to give it a rustic taste.
While that was resting, I preheated my pizza stone to 500 degrees. I took out a skillet and fried up the pancetta pieces (You can get pancetta either rolled or in strips. The stuff I used was rolled) about halfway done, so that it would be able to fully cook in the oven. I set the pancetta aside, reserved the fat in the pan, and then washed and chopped my leek into strips about two inches long. With the reserved pancetta fat, I cooked down the leeks until they were very tender and separated, and set those aside as well.
When the dough was ready, I punched that down, divided it in half, and worked each piece at a time to make a wide crust. I eased that onto my peel, which had corn meal sprinkled on it. Then I spooned the sauce on the crust, spreading it evenly, then added one and a half cubed balls of mozzarella di bufala, along with my leek pieces and torn bits of pancetta. Then, it was oven time! Ten minutes of a roaring oven (approximately) and it was done.
The sweet in the sauce and the leek paired with the salty pancetta really nicely. This wasn't red sauce and meat for the sake of each. They paired well. That should be the reason you put anything together. Not because "thats how its always done" but because it tastes right. If I were making pizza margherita, I'd use a red sauce with that too, because the entire point is to celebrate the interaction of tomato and basil. So yes, rules can be broken, but be a dear and have a reason for breaking them.
A little place for me to rattle on about cooking. Whether it's to talk about what I'm cooking, what I want to cook, what other people cook, or life experiences shared over food, I hope to share what I have with you, and I hope to learn a lot in the process.
Sunday, December 14, 2008
That elusive Japanese fried rice
I'm assuming that everybody reading this has been to a Japanese steakhouse, griddlehouse, whateva, before. Those places where you sit around the chef, who's working on an enormous hibachi, and serves piping hot food directly onto your plate. Got it? Good. So, here's my quandry: I have absolutely no idea how they make their rice so good.
Fried rice seems like it would be positively a no brainer to crank out. It's rice, a few other things, and you cook it on a griddle. I mean, we all watch the guy do it. White rice, peas, diced carrots, a bit of pulverized fried egg, some soy sauce, sesame seeds, and butter. Now, try it yourself. I guarantee you it won't taste the same. Ever since I started cooking for myself, I've tried to make this dish, and while what I make might be tasty, it just doesn't compare at all. I tried again the other day, and while I got closer than I've ever gotten before, I still failed:
My mom gave me a cast iron griddle that fits over stove eyes, and it's awesome for cooking in this style, so I not only did the fried rice, but also some teriyaki shrimp and some broccoli, onion, and mushroom to go along. Don't get me wrong, it all tasted great, but the rice was off. It's not quite the same taste.
Now, what I did was to cook rice the previous day in my rice cooker. I then mixed the cooked rice with some peas and a diced carrot and set that in the fridge overnight. When I cooked, I rubbed a pad of butter on the griddle surface, then tossed the rice on, and folded in a pair of fried eggs that had been finely chopped. As it was popping along on a good heat, I added a tablespoon or so of sesame seeds, and some soy sauce with just a little smidge of wasabi paste and sesame oil stirred into it.
If you have better success stories than I do, by all means share them. This has given me fits forever, and I'd love to solve this universal mystery!
Butternut squash soup!
Okay, I'm not a big fan of squash, but all fall I've listened to people rave about butternut this, and butternut that. It's gotten pretty unavoidable, so I figured it's time to confront the issue full on. I wanted to make butternut squash soup, and I wanted it to be awesome. Turned out that it was pretty easy. Butternut squash is the Aston Martin Vanquish of squashes, while regular yellow squash is like the Yugo or the AMC Gremlin of squash. In other words, it's really hard to go wrong.
Here's what I used for my soup:
1 butternut squash
1 medium-sized yellow onion, chopped
1 quart chicken stock
1/4 cup heavy cream
2 tbsp butter
2 tsp salt
1 tsp black pepper
1 tsp rubbed sage
1 tsp cumin powder
1/2 tsp nutmeg
1/2 tsp cayenne pepper
Pinch of cinnamon
1 bay leaf
Preheat the oven to 350 degrees.
Split your butternut squash, and remove the seeds and stringy pulp from the bulb-shaped part. Clean out the stringy stuff and reserve your seeds in a cup of very salty water. You're going to roast them later and make an awesome garnish. Take the butternut halves and put them in the oven, split-side up. Roast those for about 20-30 minutes, or until the flesh is fully tender. Test it with a knife and see if you meet any resistance. If you don't, it's ready. Remove from the oven and let cool. The outer skin should peel off pretty easily with your fingers. Set the flesh aside.
Spread the seeds on a baking dish and put in the oven at the same temp for about ten minutes. Alternatively you can dry-roast them on medium heat in a skillet. The salt water should leave behind a little salt on the seeds.
In a large stock pot, heat your butter to medium, add your onions and salt, and cover, cooking for about five or ten minutes until soft. After that, add the stock, squash, and all spices except the bay leaf, and bring to an energetic boil for about two minutes. After that's done, take it off heat and add cream. Here, you can either put the soup into a blender and liquify it, or if you have an immersion blender, use that to instead. Once it's blended up, put the soup back on for a low simmer, and add your bay leaf, letting it cook for another ten minutes. After that, remove the bay leaf, and ladle into soup bowls. Take the toasted seeds and sprinkle on top for garnish.
I had some crusty bread alongside this, and it was a great comfort food experience. With the holidays coming up, if you're making turkey or ham or another roasted meat, it'll be a nice accompaniment, so keep that in mind.
Sunday, November 23, 2008
Lazy lazy food update
Title says it all. I have been cooking lots of things, but not really found time to post them up. I'll keep them brief:
One of the two cheddar garlic bread loaves I made the other day. They sort of sagged in the middle lol, but it's otherwise great stuff. Been toasting two slices and having an egg in between for breakfast :)
Bindi Masala, an awesome South Indian curry featuring okra. This is pretty much my favorite way to eat okra, as I don't really care for Southern-fried usually. It's okay in gumbo, but this dish is what makes it a star. It's got a tangy, punchy taste from the curry I use, and I dope it up with a LOT of chili flakes. The rice is basmati, lightly saffroned, with toasted kala jeera.
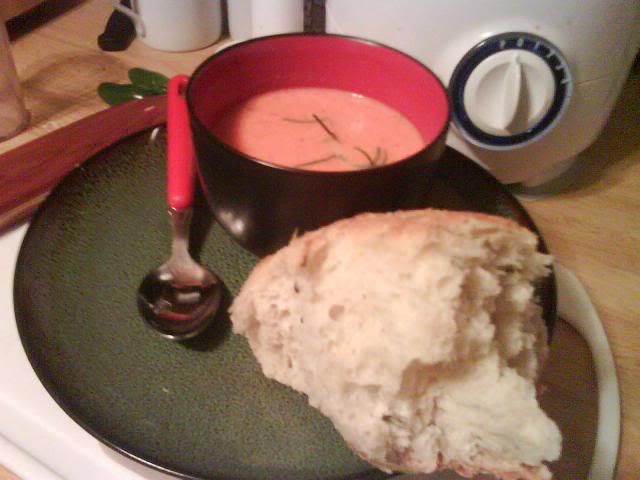
A cream of roasted red pepper soup with rosemary. This was served with some rosemary bread, which I sliced and shaved Swiss Grüyere onto, and made into crostini. I've made this one before in an earlier blog, but the presentation was crap, and I like this one much better :)
More red peppers? HE'S A MADMAAAN!!! This is some spinach garganelli pasta with a sauce made of roasted red peppers, rosemary, toasted pine nuts, and garum. Served with chicken cooked in a white wine reduction, and topped with manchego. This is pretty similar to an earlier dish I made, but I've twisted it about a little. The sauce picked up just the right amount of a sunny note from the acidity of the wine. I wanted to try making it with a bay leaf but I'll wait for that chance later.
Risotto with sliced portabellas, white truffle oil, and manchego. This time, done properly. It held together much nicer than my last go at a risotto, and tasted infinitely better.
That's about it lately. Some other crap I made, but it didn't turn out as well.
Thursday, November 20, 2008
Pizza Pizza
Who doesn't like pizza? I've met a few people who don't, but they're the vast minority and they can be isolated and shunned. For the rest of us, the vast majority end up paying some dork in a Honda Civic to deliver some oversized, overgreased, underflavored garbage that is usually regretted after all is said and done.
Well, hopefully I can liberate some of you from this hollow existence. Today, I made a pair of pies for me & my wife, and whoever we can give the leftovers to.
This pizza had kalamatas olives, artichoke hearts, crushed & minced garlic, sun-dried tomato, feta cheese crumbles, and buffalo mozzarella. I also used a pesto made of basil and oregano for the sauce, because I don't really care for red sauce on pizza. Sometimes it comes out right, but sometimes it can really steal the show from the other ingredients. That, and having tomato topping AND tomato sauce is kind of gauche in my book. One or the other please.
This pizza used an olive tapenade for the "sauce". With that were portabella mushrooms, red onions, minced garlic, roma tomato slices, and some fresh parmesan cheese to go with the buffalo mozzarella. Same principle, basically. Again, we're using tomato as a topping, so hold the red sauce.
Now, for what these have in common, and the key to make your own pizza easy: the crust.
Basically, combine a packet of active yeast with 1.5 cups of warm to lukewarm water, a teaspoon of sugar, and let it sit for about 5 to 10 minutes. You'll see it begin to bloom and fizz up, which means the yeast is alive and happy. From there, add your flour. For this, combine all purpose white flour with whole wheat flour in a 2:1 ratio. Initially, start with about two cups, and briskly stir that in a bowl. If you have a mixer, this will make the job easier. Keep adding another 1.5 to 2 cups of that flour mix in gradual amounts, stirring until the mix gets sticky and starts to form a body. Once it stiffens up enough, pull it out of the bowl and onto a floured kneading surface. Knead it up a bit until the dough isn't sticking to your fingers. Be sure to sprinkle more flour on your kneading surface if it starts getting tacky.
Now, what I like to do here is to add two teaspoons of salt to the dough ball as well as as much rosemary as I can manage. I've already said that I fiend on rosemary when it comes to starches, and the pizza crust is no exception at all. There are lots of other things you can do here, or even leave it alone. Whatever you choose, go ahead and split the dough ball into two equal sizes, and let them sit in lightly greased bowls with some plastic wrap over the top, preferably in a warm place, for about an hour. Now's a good time to wash dishes and get your mise en place on, since you'll want to give your oven a bit to pre-heat (500 degrees or so for 30 minutes) for using a stone.
What, you don't have a stone? No worry. You don't even have to pay premium for an actual kitchen-grade pizza stone either. Go to your local hardware store, and you can find those little stone walkway bricks like people use in their yards. Common sizes include fairly large circular ones, which are incidentally quite good at cooking pizza on, and save a bucketload of money! Seriously, do it this way. You can make pizza on a cookie sheet and it will probably taste good, but I've never gotten a crust I'm happy with by using them. Cooking with a stone will give you that sought-after crunch at the base of the crust, without turning the entire thing into a crouton. Your cheese and toppings will cook up quickly under that blazing heat, and the crust will get just the right firmness to keep you from having sloppy floppy slices.
You'll probably also want a pizza peel for loading your stone. Fortunately these are cheap, but if you're a total DIY hound like my wife, you can probably buy some wood and cut one yourself. It's just a large flat panel of wood, a generic handle, and a tapered blade to allow for sliding. Now, what makes this thing work is to have either corn meal or semolina flour, or some grain about equally gritty. What you want to do is to load your peel by sprinkling a pinch or two of your rough grain onto the peel surface, spreading it out so that it covers the surface. These grains will keep the semi-moist dough from clinging to the peel too much. You may need to poke underneath with a spatula to get momentum going, but the rough grains will make your job SO much easier.
With your peel loaded, go ahead and uncover a dough ball, punch it down, and apply it to your floured kneading surface. Run that over with a rolling pin good and plenty, until you get a good round shape. I usually go for around 14 inches in diameter, but nobody is keeping score here. Look at your peel, look at your stone. Whatever you can put on there, go for it. Just make sure you keep your crust thin. Now, transfer the dough to the peel, and start rolling up the edges a little, pinching as you go. This will form a little crust at the rim of the pizza. Likewise if you hate crust, nix that notion. I always like to have a little something to keep toppings off my hands.
Once that's set, spread your sauce & toppings, with an eye for even distribution. Now, if you buy mozzarella in whole balls suspended in whey (which you should if its available, its amazing), treat these like any other toppings and arrange them on the sauce. What is going to happen when the pizza gets on that stone is that the cheese is going to melt and spread out in ways you had no idea it would. Don't fret trying to overcheese your pizza. One fist-sized mozz ball is plenty enough.
I'll sort of segue here into toppings, but I don't want to dwell here. Seriously, make your own damn pizza. Make it with whatever you enjoy the most. If you don't please yourself, anybody else you please doesn't amount to much. That being said, try and not go ridiculous with the amount of toppings. I say this only because of the logistics of all of that crap actually hanging onto a pizza slice gets to be a little hairy when you're starting to add five, six, ++ kinds of things onto a pizza that should hold three, maybe four at most. Yes, each of the pizzas I made above has four toppings, so this is one of those things where I should take some of my own advice as well. Just something to think about.
Anyways, once you figure out exactly what the hell is going on this thing, it's time to shovel the peel in and have fun. Open the oven, pull the rack out to get the stone in a position where it's easy to work. Then, you want to sort of place the tapered blade end of the peel just shy of the outer edge of the stone, and gently jerk back on the peel a little to let the pizza slide. If it's not sliding, take a spatula and gently lift up parts of the pizza dough from the peel, until you get a slip. This isn't as high stress as it might sound, and you'll get the hang of it very fast, even being able to adjust a little as you go. Once the pizza is on the stone, push the rack in and close her up. Give it anywhere between 7 and 12 minutes. It doesn't take much time at all, because you're cooking at 500 damn degrees.
Once that's done, sort of reverse the process, and get the oven opened and ready your peel. Now from here, you kind of want to hold the back end of the pizza with a spatula while you shove the blade end of the peel underneath. Pull that bad boy out and slide it on a dish or a cutting board or in a box, however you do it.
Remember that other dough ball? Go ahead and make another. If you have company over, I guarantee they'll eat the first one faster than you can bake the second one.
Monday, November 17, 2008
Food for the (less) wise!
My poor wife has endured a weekend without wisdom teeth! Oh the humanity! Like so many of us, she went under the knife and had all four of her little wisdom teeth cut out this past friday. Now, if any of you remember your wisdom tooth experiences, you will recall recovering on a diet of pudding, ice cream, applesauce, mashed potatoes, and soup. Basically, whatever didn't require much of any chewing was on the menu. Now, there' s only so many times you can heat a cup of broth or spoon in some soft serve, so I tried to find a way to help her pass the weekend without suffering lame food.
Fortunately, a friend of mine had mentioned a really cool recipe for corn chowder, and it got me thinking about the creamy, rib-sticking soups that are so good this time of year. So, I decided to put something together.
Here's what I used:
2 pounds loose kernel corn (canned, fresh, or frozen)
2 onions, chopped
6 cloves garlic, crushed and minced
4 cups chicken stock
1/4 cup heavy cream
2 tbsp canola oil
2 tbsp all purpose flour
3 tsp salt
2 tsp chives
1 tsp crushed peppercorns
1 tsp cumin powder
1/2 tsp cayenne pepper
For this, get your stock pot and combine oil and flour together. Heat that up on medium heat and give it a brisk stir to fully combine it. You're making a blonde roux, so keep it stirred as it heats up and it'll soon turn a (duh) blonde color! Once you get that good color, add your chopped onions and salt, and let those cook up after a brisk stir. Keep the lid on to retain the moisture in the onions. Now, if you have some rubbed sage (I didn't) you might want to give it a teaspoon to get that good rustic country flavor. It's fine with just the cumin working for it, but sage is going to taste really good in a lot of these fall foods.
Let the onions cook for about five or so minutes to soften up, and then add in 3/4 of your corn, all of your stock, cream, and cumin. Bring it up to a boil and let it reach a healthy rolling boil before taking the stock pot off the heat. Go ahead and add your garlic and chives at this point. Now, if you have a wand blender, this would be ideal, but even if you just have the regular sort of blender, you can do this. Either way, you want to blend that soup. Spin your blades good and fast so you can zip up the onions and corn and leave little in the way of solid matter. Once that's done, put your soup back onto a medium heat, and add your remaining whole corn kernels. Let it cook for another 10-15 minutes, and you're set.
A little of this soup goes a long way, and this is enough to feed a good six or eight servings. I initially pureed all of the corn, but later on my wife was able to eat a little, so I made a batch with the kernels in it. Needless to say, she hasn't had to suffer through boring food just on account of a little tooth ripping!
Also, I got the 411 from my better half that my father-in-law is now browsing my blog, so I'll give him a shout out. I've heard he's almost as much of a foodie as I am, and I know he makes a mean crepe. Perhaps soon we shall see who's kung fu is stronger!
Tuesday, November 11, 2008
Oh, the neglect, but I got a recipe for you guys!
Yes, its been a while. No, I haven't forgotten about my blog. Actually, I've been cooking at a break-neck pace lately and occasionally taken pictures. Alas, I just haven't really sat down to post about anything. Shameful I know, but I'll try and get caught up. In the meantime, I had an awesome lazy food moment last weekend during the Bama vs LSU game and I figured you should know about it:
I figured some of you guys might appreciate this. I used this to great effect last weekend when I cooked for a football party. It's a stupidly easy curry to prepare since you really don't have to prepare much of anything.
What you need:
About 3 pounds of goat meat (I buy at halal markets so it's still got the bone, but it'll separate in a crock pot, don't worry) but you can substitute with lamb or beef if you can't find goat.
Three onions, finely chopped
Seven cloves of garlic, crushed and minced
1 can of coconut milk (about 1 2/3 cup)
1 cup chicken stock
4-6 tbsp curry powder
2 cups frozen peas OR 2 cups diced potato, whichever you like
6-12 chili peppers, dried & crushed
Mix your onions and 1 tbsp of curry powder and set in the crock pot for an hour, then come back and add your goat, the rest of the curry powder, coconut milk, chicken stock, and chili pepper, then let cook for another four hours, stirring it up every hour or so. Come back and add the peas and garlic, and let cook for another two hours.
You can serve this with either jasmine or basmati rice, or if you want to be traditional, some naan or roti. It's great either way.
Make sure you have some IPA or a good lager on hand when you eat. Very tasty party food.
Saturday, October 18, 2008
Bread, Part Deux: The Leavening!
It's safe to say that I've caught the breadmaking addiction, so I'm riding this wave while I can. Here's my latest batch:
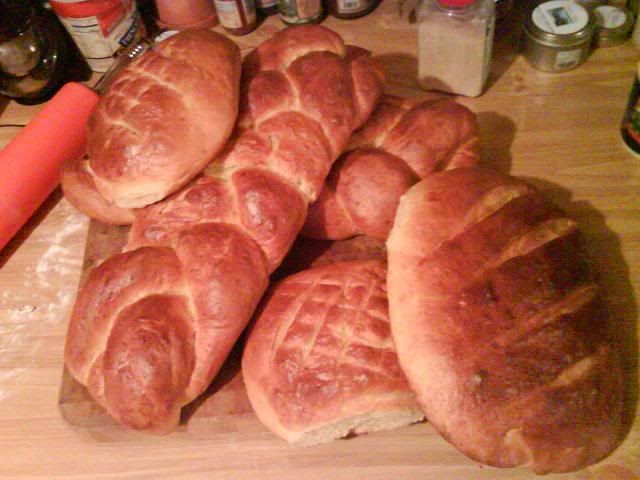
Same recipe, but this uses aged cheddar and garlic powder rather than grüyere and rosemary. I also opted out of the cheese on top to give it a cleaner look. The taste of cheddar and garlic is a lot more subtle than rosemary and grüyere, but I think the texture improved a bit. This was a double batch, and I divided it up for different loaves. The little loaves were supposed to be boulle, but I kinda mooshed them a bit when setting them on the pan. Next time, I'll ball them up for maximum height. My next plan is to make things I can eat soup out of!
As for this ridiculous bread horde, it's being given out to friends and family. Besides, there's football on tomorrow, and people need nibble food!
Thursday, October 16, 2008
Bread!
I love bread. Who doesn't? I mean, you'd have to be some kind of North Korean Robot to not like bread, which is why I serve it to all of my house guests, just to be sure. . .
That being said, despite my love for it, I've never made it. It falls into the nebulous world of baking, which for so long has been one of those "Here there be Dragons" territory. To a guy who measures ingredients by eyeball and hardly ever bothers to read a recipe, it's scary stuff. Of course, it's bread, and it's delicious. That's enough for me to get over my fear. Plus, I am too lazy to go down the road to buy bread. I've got flour and...stuff. Sounds like a plan for failure right?
WRONG! OHH YEAH BABY THATS THE STUFF!!!
I have no idea how it turned out so well, as I was fully expecting to make something half-crappy the first time. Instead, I rock out a megaloaf of bread that looks as awesome as anything I've bought in a market. Here's how I did it:
Gather these ingredients together:
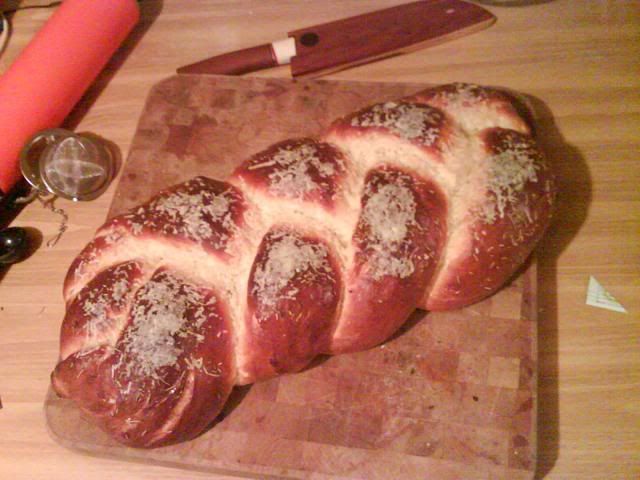
When you come back, plop the dough back on the table and punch it down, kneading it down again. From here, you can form the bread however you please, whether it's baguettes, boulles, rolls, etc. I went for braided bread, dividing the bread into three equal pieces, and rolling them out into equal lengths. On a non-stick cookie sheet, I pinched one end together, and braided them up, pinching the other end together and tucking both ends under the rest of the dough. From there, I let the dough rest for another hour in a warm place, covered up in the damp cloth.
After the hour's up, the dough will have puffed up again. Pre-heat the oven to 400 degrees, then mix the egg, teaspoon of salt, and tablespoon of water, and glaze lightly along the dough's surface. Don't use too much, or you'll just get scrambled egg on your bread. You just want enough to wet it all over. After this, sprinkle the dried rosemary on top, and pop that bad boy in the oven for 25 minutes, or until the crust gets a nice light brown to it. Pull it out quickly and sprinkle the remaining half cup of grüyere on top. Pop it back in the oven between 5 to 10 minutes to let the cheese brown, and then bring it out again. Let it cool for a good 15 or 20 minutes before even thinking about a nibble.
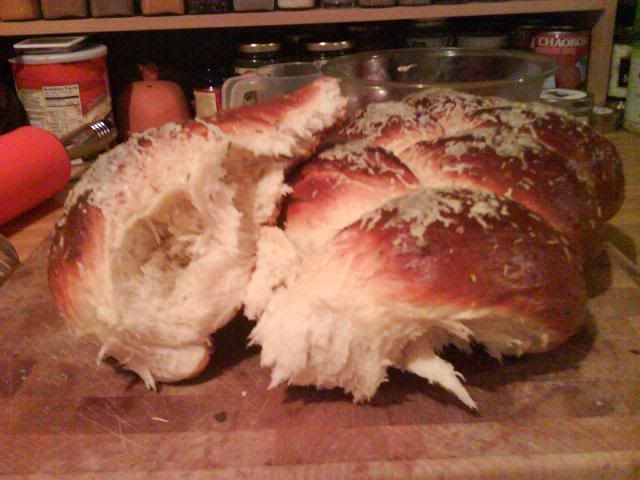
Fifteen to twenty minutes up yet? Get some good olive oil, crack some peppercorns in a dish and add a little inside. Break some bread with friends! Seeing how well this turns out, I'll be making stuff like this at least every week.
That being said, despite my love for it, I've never made it. It falls into the nebulous world of baking, which for so long has been one of those "Here there be Dragons" territory. To a guy who measures ingredients by eyeball and hardly ever bothers to read a recipe, it's scary stuff. Of course, it's bread, and it's delicious. That's enough for me to get over my fear. Plus, I am too lazy to go down the road to buy bread. I've got flour and...stuff. Sounds like a plan for failure right?
WRONG! OHH YEAH BABY THATS THE STUFF!!!
I have no idea how it turned out so well, as I was fully expecting to make something half-crappy the first time. Instead, I rock out a megaloaf of bread that looks as awesome as anything I've bought in a market. Here's how I did it:
Gather these ingredients together:
- 6 cups all purpose white flour
- 1 1/2 slightly warm water
- 1/2 cup milk
- 3 tablespoons butter
- 2 tablespoons sugar
- 2 teaspoons salt
- 2 packs of active yeast
- 1/4 cup rosemary (fresh if you can)
- 2 1/2 cups Swiss Grüyere cheese, grated finely
- 1 egg
- 1 tablespoon water
- 1 teaspoon salt
- 1 tablespoon dried rosemary
When you come back, plop the dough back on the table and punch it down, kneading it down again. From here, you can form the bread however you please, whether it's baguettes, boulles, rolls, etc. I went for braided bread, dividing the bread into three equal pieces, and rolling them out into equal lengths. On a non-stick cookie sheet, I pinched one end together, and braided them up, pinching the other end together and tucking both ends under the rest of the dough. From there, I let the dough rest for another hour in a warm place, covered up in the damp cloth.
After the hour's up, the dough will have puffed up again. Pre-heat the oven to 400 degrees, then mix the egg, teaspoon of salt, and tablespoon of water, and glaze lightly along the dough's surface. Don't use too much, or you'll just get scrambled egg on your bread. You just want enough to wet it all over. After this, sprinkle the dried rosemary on top, and pop that bad boy in the oven for 25 minutes, or until the crust gets a nice light brown to it. Pull it out quickly and sprinkle the remaining half cup of grüyere on top. Pop it back in the oven between 5 to 10 minutes to let the cheese brown, and then bring it out again. Let it cool for a good 15 or 20 minutes before even thinking about a nibble.
Fifteen to twenty minutes up yet? Get some good olive oil, crack some peppercorns in a dish and add a little inside. Break some bread with friends! Seeing how well this turns out, I'll be making stuff like this at least every week.
Monday, October 13, 2008
Ossum Rasam
Dino over at Alternative Vegan has a recent blog posting you should all take a gander at, especially with fall in full tilt. It's a recipe for Rasam, which is a warming South Indian comfort food. I bought his cookbook ages ago and have always wanted to make it. What makes things crazy is that two local restaurants have it on the menu, but I am always disappointed when I ask, because "no we are out of Rasam, so sorry."
Well, I finally managed to get the time set aside to make it:
It's pungent, tart, and really, really WARM. Not a searing pepper heat that hurt, but I mean I had this wonderful toasty feeling from the bottom of my stomach to the tip of my nose and my lips, and all in between. Dino's not kidding, this is comfort food you really need to dabble in when the weather tanks out. Big kudos on a great recipe.
A dud.
Sometimes, you make something good. Sometimes, despite your best efforts, you make an abomination. I got a little bit frustrated on this one:
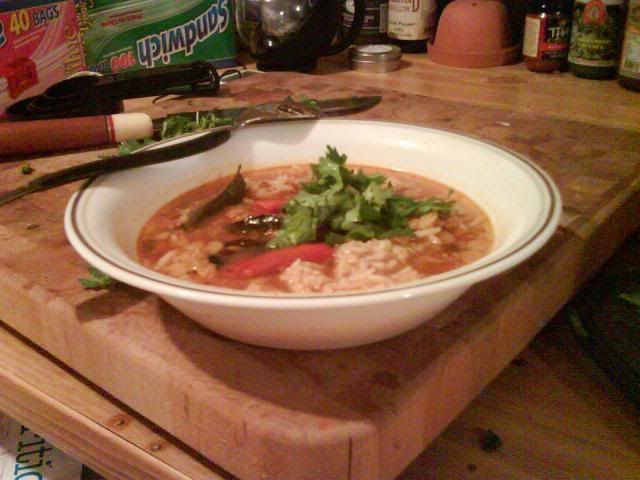
Pay no mind to the soup. It's cream of heirloom tomato and despite being a little on the boring side, it tasted pretty good. No, my rage goes out to the abomination beside it. It was supposed to be pan-seared chicken with a balsamic vinegar reduction, roasted garlic cloves & peppers, with manchego and a garlic flatbread. In other words, it was a big pile of fail. The reduction turned out crap, the chicken dried out, and the peppers were awful. I got too distracted with attempting to make it look interesting and I made something crappy.
Oh well, at least the soup was tasty.
Sunday, October 12, 2008
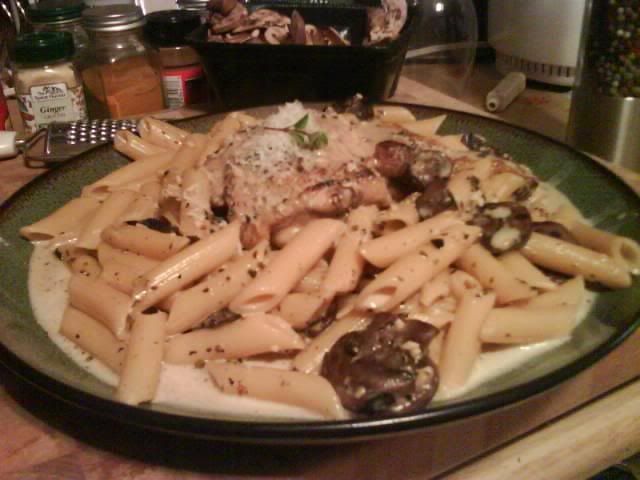
Now that I have plates, I should learn how to plate.
I can't plate, guys. At least, not yet. Sure, I may have aspirations, but so far not a whole lot to show for them. I'm trying to change that around a bit, and I'm taking a more hands-on approach to not only how my food tastes, but what it looks like. I asked people whose opinions I value about some of my past stuff, and their answers were very helpful, but also deservedly harsh. I'm taking those lessons to heart, and I'll be trying to present food that's a bit more pleasing to the eye. My wife will likely roll her eyes at me, as she's going to be happy whether it's a carefully-arranged dish, or its ingredients that are more or less cooked and thrown in a bowl.
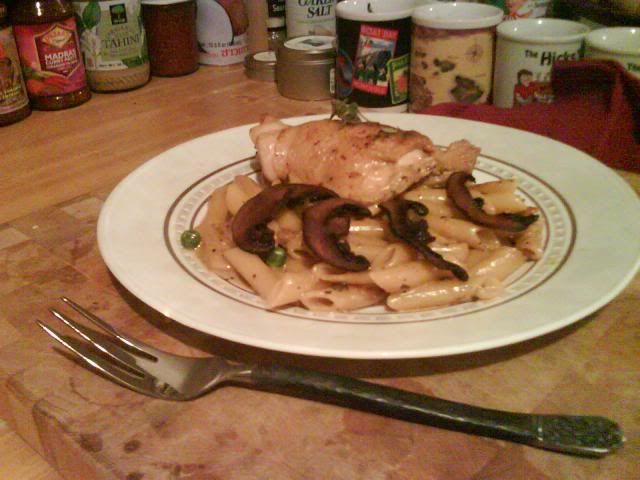
This is a variant on that rather-successful mystery meal that I made for my wife a few weeks ago. The chicken stock & cream sauce includes diced portabellas and oregano, which ties into the garnish and the (awesome!) slivers of fried portabella served on top. I have to remember to do this more often, they turned up so tasty and crispy.
At any rate, it's still not super artsy, but I think it's coming along. The garnish isn't a shrubbery set on top of the food because custom demands it. I'm keeping things centered up a bit, and not getting too fancy. I do wish I had used more peas in the penne, because I like the green color. There's always another time.
Saturday, October 11, 2008
He who controls the spice...
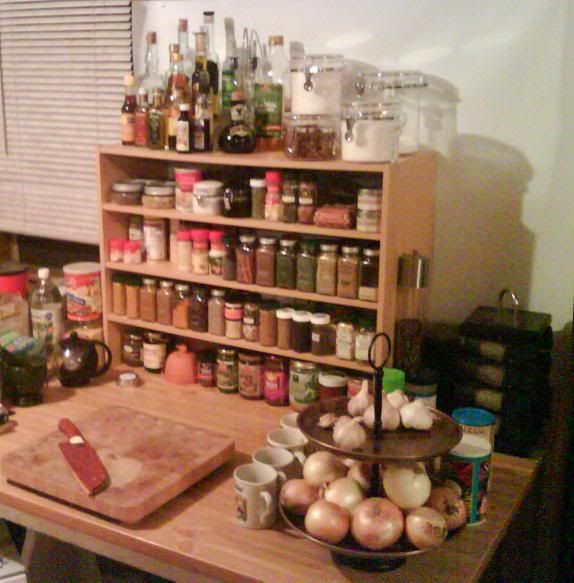
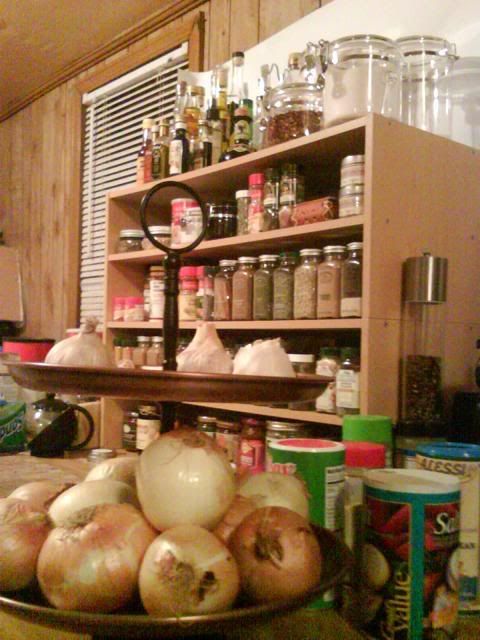
My wife surprised me when I got home from work tonight with a little bit of organizational genius:
Using a little bit of modular shelving and a lot of imagination, she built a "spice rack" for me. Now, I think that's funny because look to the right of that behemoth. That is what passes for a spice rack of the sort that you'd find at any random kitchen shop. Mind you, it's got the basics like your cumin, oregano, basil, pepper, bay leaf, blah blah blah. But a 20 spice rack just don't cut the mustard in this joint:
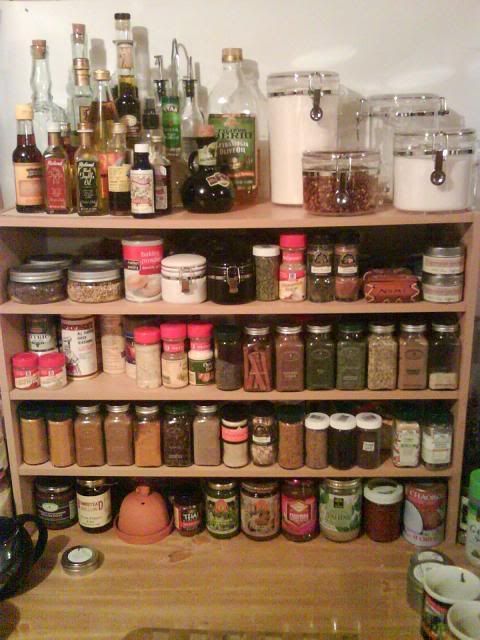
Frontal shot of the awesomeness. This shelving's great because I can keep surplus and random baggies tucked behind and out of my way. If you'll believe it, this whole mess used to be spread helter skelter across the entire table. Guess how frustrating it was to pick through a billion jars? A little bit!
Big happy garlic & onion thing. I married a Sicilian, it's a kitchen necessity! Anyways, my better half done a real good thing, and I'm happy to have a nice and organized pad to go all mise en place with, so you'll be seeing a lot more of this awesomeness!
Monday, October 6, 2008
Feeling a little goaty lately
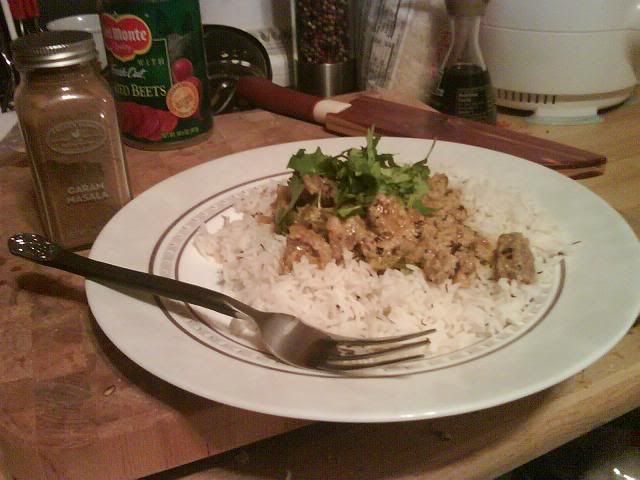
All double entendres aside, after getting my new dishes and silverware, I have been looking for an excuse to make something nice. Since the remainder of my okra went sideways before I could crank out another round of bindi masala, I convinced my "I don't eat Indian food" wife to eat another round of curry. I had a nice bag of frozen goat I picked up at my local Indian grocer, so I put it to the test with...a mango.
This was a strategy to get my wife on my side, since the only curry she eats that I don't cook is an Afghan dish with chicken in a mango sauce. So, she signs onto the idea, and I find out very quickly that both goat and mango alike are a little frustrating to cut and process! My efforts eventually pay off and I cube out the goat, then slice, peel, dice, and puree the mango into some yogurt with ginger, lime juice, and spices. A few whole spices in raging-hot oil in my cast iron skillet, and in went some onions and peppers. At this point, an absurd amount of red chili flakes hit hot oil, creating the effect of a tear gas grenade in the kitchen. The cats fled and started to retch, and I got yelled at. This is the price I pay for mad science, since everybody knows I have no idea what I'm doing at times!
Eventually, goat was added and browned, then the yogurt sauce was ladled in to give it that nice turmeric-induced patina. I had basmati rice with kala jeera in reserve, and so we all know how this story ends. Garnish with cilantro, and there we go:
Aren't my plates and flatware pretty? ^__^
The curry was great, but I think slightly tart. Not bad for basically BS'ing a dish, but I think I can take the lime out and improve things. My wife doesn't care for whole spices, so next batch is going to take it easier on that sort of thing. I didn't hear her complain about the pepper after she was served, so I am going to consider that a win.
Tuesday, September 30, 2008
My very first risotto, oooh!
I just got into the wild world of risotto, after having one of the tastiest dishes of my life on my honeymoon. I've heard so many horror stories from everybody about making this stuff, but it hasn't deterred me at all. If I can even come halfway to making something that good, I'll be a happy guy. I had bought some bags of arborio rice a few weeks ago with the notion of doing it eventually, but after getting some new cookware for a belated wedding gift and realizing that I have $5 worth of heirloom tomatoes in the fridge that need to be eaten this week, I figured I'd give it a try.
The chicken thigh on top was nothing to write home about, and honestly I wish I didn't even cook it. The pan-fried garlic cloves, however, were mega good!
I pan-fried a diced tomato in clarified butter, and added the arborio, letting it cook and get oily. Then I added pinot grigio and let that reduce at a higher temp, then brought it back down to a simmer, and slowly added the better part of 1 1/4 quarts of chicken stock. I used about a quarter of three different heirloom tomatoes to get that silly multi-color effect thing, and added fresh basil from my garden. That was topped with sea salt, cracked pepper, and grüyere cheese.
I don't know what all the fuss is about with this, it was pretty easy to make. I think mine was just a shade below al dente when all was said and done, but that was because I ran out of stock. It maybe needed another ladle and it would've been there.
At any rate, I am stoked to make more of this, and am eager to hear your suggestions. I figure getting a risotto cookbook from my mom and hearing a food podcast for risotto come up today was a sign, because I've really got it on the brain right now.
Wednesday, September 24, 2008
Another ad hoc meal!
My wife put her foot down and said that she didn't want to eat any more Indian food. Oh the despair! Of course, I then come home to find her eating one of my fridge portions of palak paneer that I had made the other day, which she then decided she didn't want to eat anymore, and gave it back to me. Thanks sweety!
She then told me that she wanted me to fix her something. Well, I'll never tell my lady no, so the answer was naturally "What do you want?" She's infamous for being cryptic or indecisive sometimes, so she just says "Something with a chicken thigh, and mushrooms (we're trying to use them up before they get old), and don't make it too fancy!"
I'm not exactly sure what her definition of too fancy is, but remembering the magic I worked with my sister last week, I tried to improve on it a little:
This is what I came up with. Basically, I oiled my cast iron skillet just a tiny bit and put some water on in a small pot for penne pasta. Put a chicken thigh, 2 cloves of crushed and minced garlic, and two heaping handfuls of portabella mushroom slices into the very hot pan and let them get crispy and aromatic. I then poured chicken slowly into the hot pan, and deglazed with it as the chicken continued to cook. To that, I added ample oregano, basil, and cracked peppercorns, then plucked the penne from the heat when it was about half cooked. I drew the chicken from the pan, then added the half-cooked penne and a few tablespoons of cream and let both the penne & mushrooms cook and the sauce reduce. Once we were at a semi-thick state, I skimmed the pasta and mushrooms onto a plate, rested the chicken atop that, and poured on the cream sauce. The chicken was topped with shaved Manchego goat cheese, and a sprig of fresh oregano for garnish.
So it was fancy, so what? Two out of three objectives completed. I didn't hear any complaining about fancy eats by the way, so I will take that to heart!
Monday, September 22, 2008
Gajjar Ka Halwa, the best carrot-based dessert ever.
I rarely ever make desserts. I'm not very good at baking, and that limits my options sometimes. There are, however, a few things that I get a huge craving for at times, and one of those things is gajjar ka halwa, which is an Indian carrot pudding.
Use this stuff:
1 pound carrots
3/4 cup water
1 1/2 cup milk
1 cup sugar
1 tbsp ghee (not pictured)
1 tsp vanilla extract (not pictured)
1 tsp crushed cardamom seeds
1 tbsp chopped almonds
1 tbsp chopped walnuts
Dried fruit (optional)
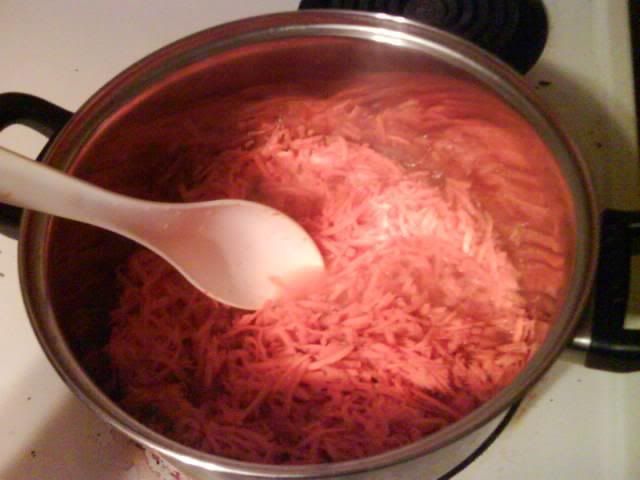
Grate up your carrots, and get the water up to a quick boil. Combine all that and let it cook for about five minutes on high heat.
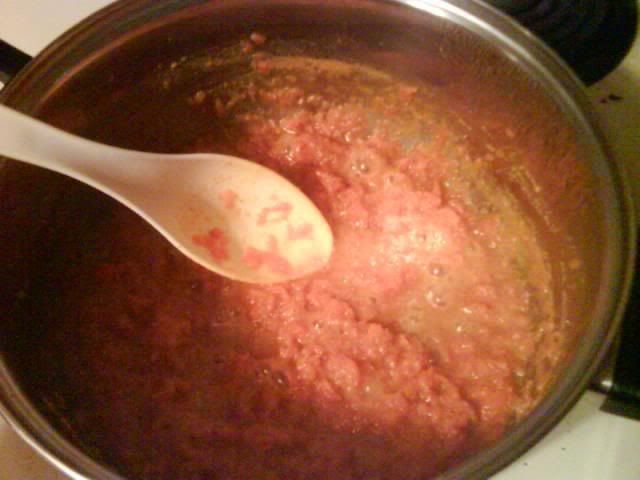
Add milk, bring down to medium-low, and cook for about an hour to let the liquid reduce and the carrots to soak up a bunch of milk. Add sugar and stir. Keep cooking until the consistency evens out and the liquid becomes syrupy:
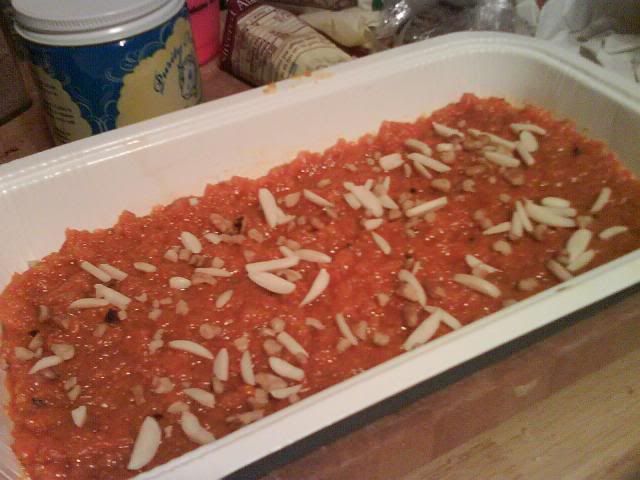
Add your ghee and cardamoms and keep on a simmer for another five minutes to distribute the cardamom flavor. Take it off the heat, put the vanilla in, stir thoroughly, and put into a dish:
Add your nuts and/or fruit on top. I've got some strawberries in the dehydrator that'll go with this in the morning. The serving size is pretty small, this stuff is incredibly sweet. You'll never go back to carrot cake after you try it.
Sunday, September 21, 2008
Pepperocalypse, continued
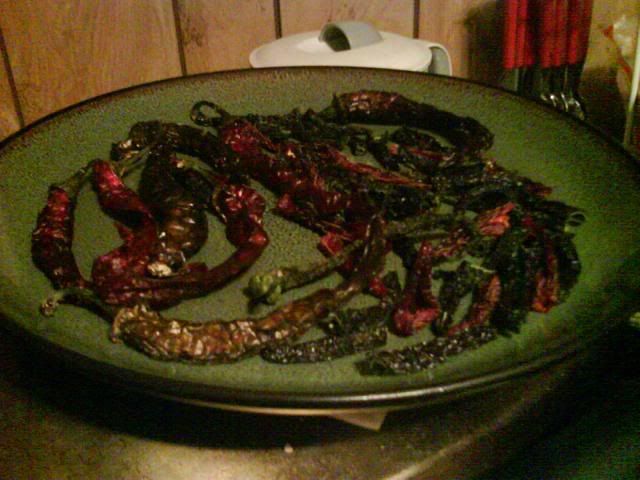
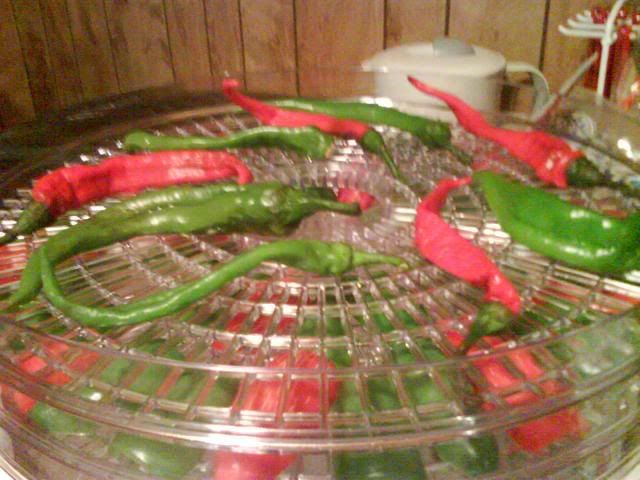
When I last left you guys, I had put a haul of peppers into my dehydrator and was getting ready for a long haul. Turns out that it was a relatively short haul. It took less than a day to get the desired effect, which was a plate full of crisp, awesome peppers!
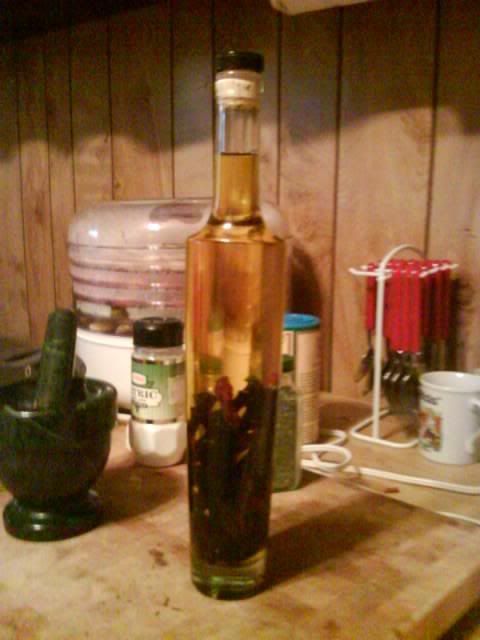
I took the cow-horn peppers and tucked those away for a rare treat, when I get in the mood for a good curry and want to crank up the heat. The jalapenos went to a little experiment:
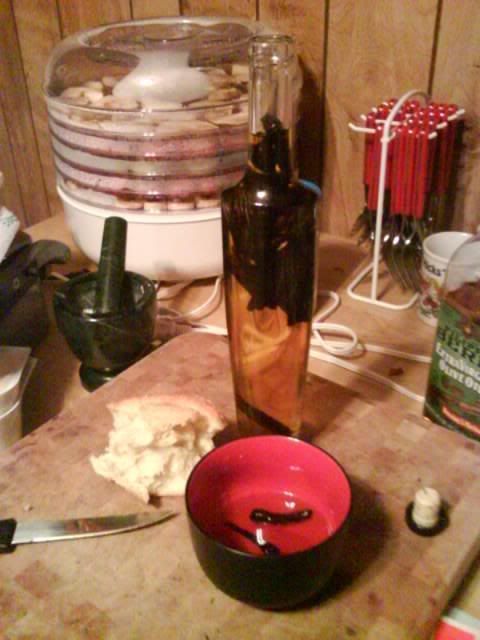
Pepper oil! How novel! Oil that is hot, to put on things to make them hot! Liquid heat, even!
I tasted it, but much to my chagrin, it was not hot. HOW DO I MAKE THE HOTNESS???
Fortunately, my buddy Dino at Alternative Vegan once again saved my day, after a bit of laughter at my predicament. His answer was to cook the peppers and oil on medium-low heat for a bit, to release the capsaicin (aka, the heat) in the dried peppers. After a bit of emptying and cooking, I returned the oil and peppers to the bottle, and voila!
It's hot without taking the paint off the walls, and its AWESOME with a little paisano bread, for a bit of an unusual taste. This is totally rad stuff and you should make some.
Thursday, September 18, 2008
The Pepperocalypse has Begun!
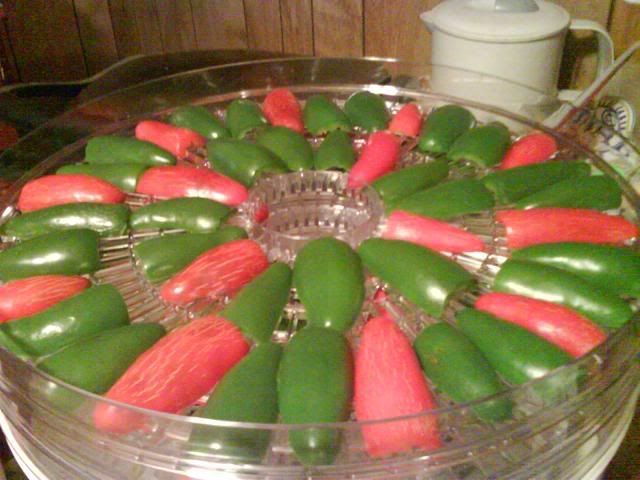
My wife bought me a food dehydrator, and of course I raided a bunch of phat loot from my grandpa's produce pile the other day. I can't resist the temptation to dry some of this stuff, so I started with peppers today. I had a bunch of red & green jalapenos and a few red and green cowhorn chilis too. I blanched them all, then sliced and de-seeded the jalapenos in preparation for the dehydrator:
Gotta move the trays around every six hours or so for the next two days, but once that's done I should hopefully have some awesome dried peppers that I can crumble into food or put into olive oil for a spicy kick.
I keep going into the kitchen to steal a glance, hoping to see a little bit of shrively action happening. Can't wait! Stay tuned to see how these babies turn out!
Wednesday, September 17, 2008
My sister is special
Had a bit of a fun day today full of chores and errands and odds and ends that accompany me taking the early shift in to work and skipping out with plenty of time in the day. This inevitably led me back to my parents' house, where I naturally raided the fridge and ended up hauling away a few pounds of produce from my grandfather's garden (yet again). Don't call the police on me yet, I had permission :) Besides, who is going to actually refuse fresh cow-horn peppers, jalapenos, okra, and apples? Not me, for one!
As I was grabbing my loot and laughing madly, my sister was lackadaisically reaching for a bag of croutons as a snack while she watched her talk shows. I gave her a look, and asked if she wanted me to make her some real food. She said there wasn't anything to eat in the house, which I turned into a challenge. Now, limited items is one thing, but my sister is a special sort of picky eater. She likes a lot of those southern veggies (collard & turnip greens, etc) that I don't care for, but she doesn't like onions, tomatoes, bell peppers, or a bunch of other little things that show up in far more variety. I settled on jalapenos and some olives, which are more snacky things than real veggies, but that was okay. I found some chicken strips in the freezer and thawed them out, then dropped them in the deep skillet. Then I reduced a can of chicken broth in a small pot. When reduced, I added it to the chicken in the skillet, then I added a little cheese, some garlic, basil, and a touch of cayenne pepper to make a sort of sauce. In went the olives and peppers while I cooked some whole wheat rotini in the pot. When it was just shy of done, I drained it and added it to the skillet and let it simmer together, adding a teaspoon of bacon bits at the end. It wasn't the healthiest thing I've ever made and I would have done it a lot differently if I were cooking for myself, but it was really a fun thing to have a challenge like that.
Tuesday, September 16, 2008
An ode to a knife
Let me be frank with you all. I am wrong quite often. If you observe me being wrong, point it out and gently guide me to common sense that I stray away from. I may not thank you then, but I will certainly do it later!
A case in point is for every wannabe cook or chef I know who has ever said a word about a good quality knife, and given me quality advice about getting such. I nodded like I was paying attention and I humored everybody who said that "you really should pay for a quality knife". Inwardly, I scoffed. What do I need a $100 knife for that isn't stainless, isn't machine-washable, and requires sharpening on occasion? Why, I paid $20 for this entire SET of fine knives (lol) at Target and it cuts everything I need cutting! Sure, I may have to saw on the occasional bit of difficult meat, but I get it cut, don't I?
Well we don't have to think about it too hard, I WAS AN IDIOT! I realized I was an idiot the moment a good friend of my wife's gave us a really nice knife of our own:
I looked at the Isbjörn knife, thought it was too pretty for everyday kitchen duty, and wondered how often it would be used before it was put aside in favor of my workhorses. Well, needless to say that it took all of one day of cooking for me to change my tune. I found to my amazement that I could actually chop onions like they do on TV, rather than gritting my teeth and sort of torquing down on my knife, as the back & forth motion gave me a lopsided cut. Tomato slices became thin and gorgeous, and I wasn't smooshing half the guts out on my cutting board like I used to do with the econo line. If that didn't tell me all I needed to know, I found it out with chicken breasts, when I was able to zip the cleanest lines in raw meat that I'd ever seen. It was like cutting tofu or semi-soft cheese. The old back & forth action? Forget it. One pass and it's done. The straw that broke the camel's back was actually breaking the shallow tang on one of my piece-of-crap econo knives when cutting a sliver of Swiss Grüyere! What garbage is that?
I may keep my bread knife from that set, maybe. I will upgrade to steak knives that are actually nice, I know for certain. The rest? They're yours if you want them, but caveat emptor. I've discovered monogamy in knife form, and I'm forever a changed man. So let me give a lesson to a few of you out there, and yeah I know you may ignore it as I once did:
GET A REAL KNIFE
It makes the kitchen a vastly more fun place than you realize :)
What do I make my wife for dinner to get on her good side?
Garum Angel Hair with Spinach Calimari Fritti and Red Pepper Pesto!
I don't know what it is about this wonderful dish, whether its the onslaught of aromatic and savory influences, the wonderful colors, or just the off-beat use of garum, but of all the stuff that I cook, this is the one that she comes back for again and again. Now, I love to make NEW things, so in my mind, going back to the playbook is okay, but not ideal. That being said, if mama ain't happy, ain't nobody happy!
Okay, this is broken down into a few things. Here's the overview of it. Take notes, there's a test later!
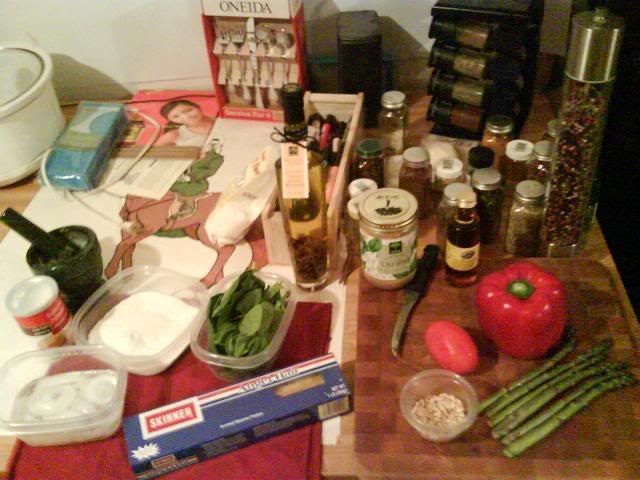
Got all that! Put it in a bowl and hit it with a hammer. That's how you make my dish! Ta-da!!!
Kidding, kidding.
Let's start off with the pesto sauce. For that, you want:
One large red bell pepper
Two teaspoons olive oil (I used an oil flavored with garlic and mushrooms)
Teaspoon of dried oregano
Teaspoon of dried basil
Teaspoon of fresh rosemary leaves, chopped
Cracked black pepper (maybe half teaspoon?)
Pinch of kosher salt
Handful of pine nuts
Two teaspoons tahini
1/4 Roma tomato
Cut your pepper in half lengthwise, and lay in a pyrex or similar baking dish. See the seeds inside? We hate seeds! Yank them out and throw them across the kitchen with rage. Make sure you clean out any stowaways too. Now, along the inner flesh of both halves, spread your olive oil, herbs, salt and pepper. You have something that probably looks like this:
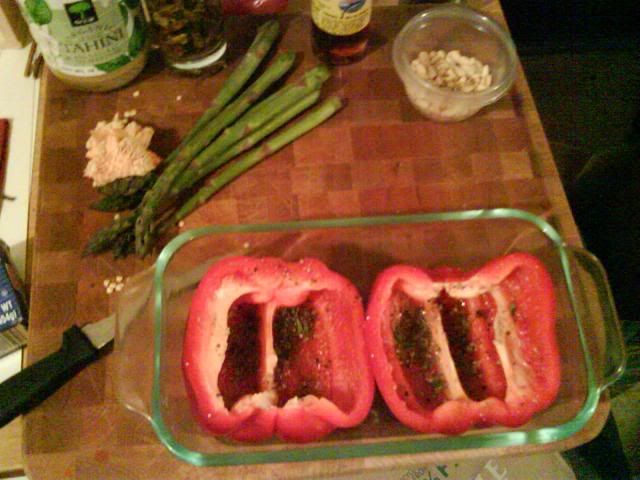
Preheat your oven to 450 and slap that sucker in for about 15-20 minutes, or until the skin on the bottoms starts to brown and pucker a bit.
While that's happening, grab your pinenuts and put them in a skillet on medium heat without any oil. Roll them around a bit until you get a good bit of browning on them:
Shouldn't take long at all, and once they start to darken up a little, take the skillet off heat and put them in a dish.
Have a beer. Relax. Maybe do some dishes. You can also take this opportunity to make the spinach batter for the calamari fritti.
Easy peasy, here's what you need:
About a half cup of gluten free rice flour (add more to adjust consistency)
About half a cup of water (keep this conservative)
Big huge wad of baby spinach. (About two good fistfulls.)
Two pinches of kosher salt
Teaspoon of baking powder
Half teaspoon cracked black pepper
About a dozen calamari rings (give or take)
Oil for frying (I use canola)
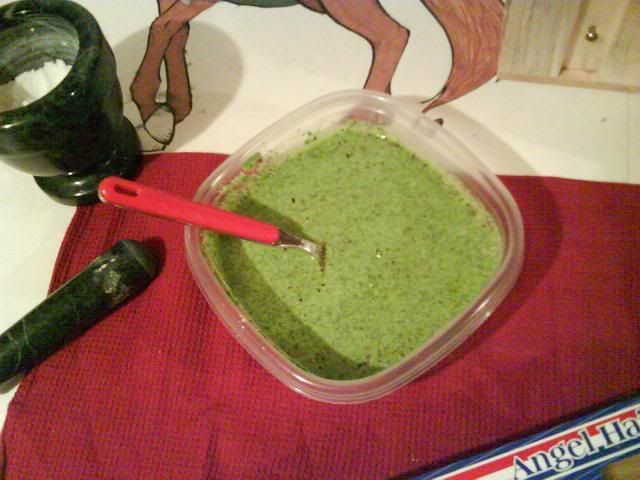
Okay, zip your spinach in a processor. I mean really go to town on it. You'll probably want to add a little of that water to the spinach so that you can keep the blades spinning and really get that stuff reduced into nearly a paste.
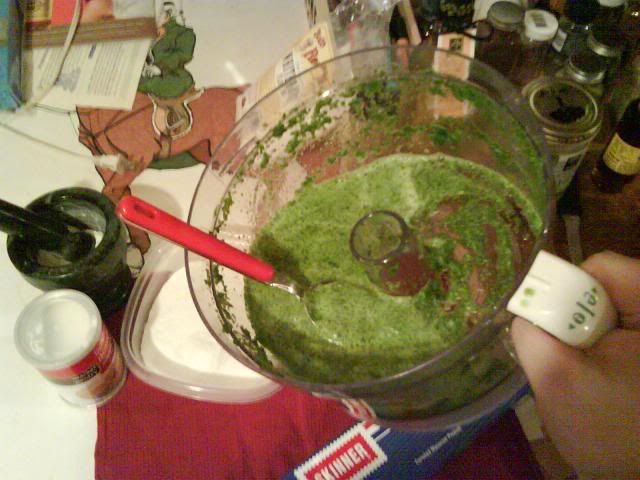
Looks like a green milkshake, kinda. That's good. We want the gorgeous color that the spinach has in it, and this is going to make a beautiful batter.
Add the salt, pepper, baking powder, and spinach milkshake to your rice flour.
If it's watery, add flour. If it's cakey, add water. The best way to test is to dip a ring of calamari into the batter. If it sticks in a generally uniform way, it's perfect. Either way, set this batter aside for now. You'll be using it soon.
Zut alors! Your peppers must be done by now!
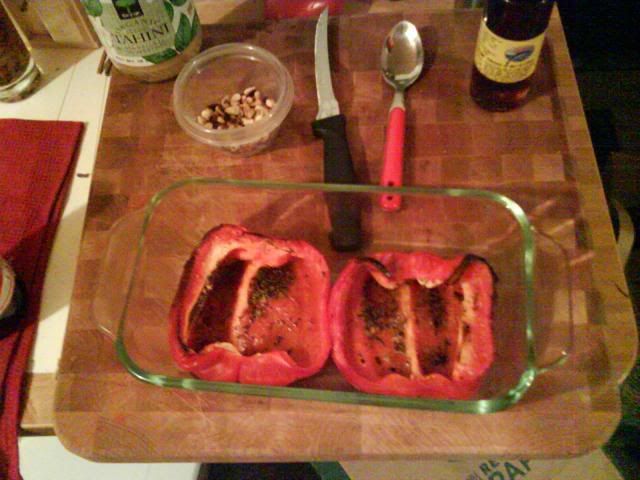
Doesn't look like much changed, except for that shot of steam in your face and that wonderfully pungent pepper smell. Look at the skin. See how its dark and a bit pruney? Let this sit and cool for a while (PS get another beer). When its cooled to where you can handle it, flip each pepper half over in the dish and give the skin a tug. It should slough off almost entirely in one big piece. Throw that skin away, its work is done :)
Now, plop both halves of pepper, spices, and oil into your food processor. Add your tahini and piece of roma tomato, and puree. You want a nearly uniform pesto. It's okay to have a little chunk, but we want to keep that to a minimum. Once it's done in the processor, scoop that fire-red pesto into a dish and crush your pine nuts, stirring them inside. I didn't take a picture of this for some reason, but you will see the finished result later.
Now, back to frying the calamari fritti. I fry in a cast iron skillet but this is the sort of thing that a deep fryer would also work well for, or anything where you can add more oil. Start nearly at high temp. I choose canola because aside from being generally one of the healthier oils, its got a high smoke point, and tolerates a temperature that high. At any rate, you want it nearly at high temp, and then dial it back to medium high to drop your calamari in. This is going to flash seal your batter and allow for a slower, tastier cooking of the stuff within. Too often calamari is tough and rubbery, but it does not have to be. You're only going to have the rings in the oil for about two minutes, tops. Get them out and set them on a drying rack, like this:
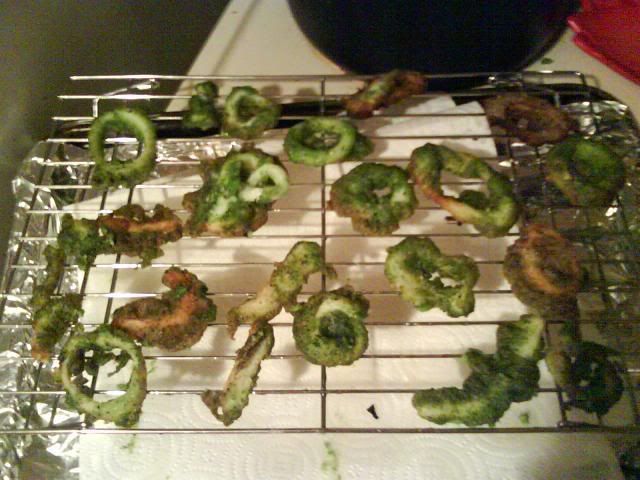
Notice the green? It doesn't look like much, but wait for it in the final dish. Take a tiny pinch of fine-ground kosher salt and slightly sprinkle on each ring while it dries on the rack.
While your calamari cools, take about six stalks of asparagus, and cut the pale bases of the stalks off. In another pan, add just barely enough olive oil to moisten the bottom, and crush half a clove of garlic. Cook on medium heat for about five minutes or so, and remove.
While that's simmering a little, slice out about six very thin slices of roma tomato, and set aside.
Now, what are we forgetting? Angel hair pasta! The base of our dish! I hope I don't have to tell you how to cook pasta, BUT if you are that one person who has never done it before, you want a big pot 3/4 full of water on high heat, with 2 teaspoons of kosher salt as well. When it boils, drop in your pasta. I used a full pack, but I wouldn't recommend it as it made too much pasta for the servings I was going for. A half pack should be fine. You will stir the pasta and water for about two or three minutes, and then take it off high heat and put into a collander to shake out any excess moisture. Transfer that to a big bowl where you can toss that pasta, because we're going to add some oil and garum to it!
What is garum? GLAD YOU ASKED!
Garum is a family of sauces and additives that was popularized in the ancient roman empire. It's very similar to some southeast asian fish sauces, and usually involves parts of fish, whole fish, fish guts, etc of whatever people had, put into a brining barrel, and left over the summer season to ferment.
Disgusted yet? Don't lose heart, fermenting is great! It's a magical process, and if you don't believe me, ask the beer in your hand what it thinks about it!
At any rate, the garum I use is a particular kind, called garum colatura. If you must know, it is made of gutted anchovies, and comes from Italy. It has an amber color, a lightly pungent, vaguely bready, vaguely fishy smell, and a salty taste, with an extremely subtle essence of fish. I take about two tablespoons of this stuff, and pair it with four to five tablespoons of my garlic and mushroom olive oil:
Add a bit of cracked black pepper, and toss that about until the entire batch of pasta has a glistening, oily patina. You'll catch faint notes of that rustic garum smell as you do it, and I guarantee you'll be anxious to finish this dish.
Fortunately, you're done! Arrange on a plate as you will (I suck at plating but that's something I'll get with repetition) and serve! With a half pack of pasta, it will be good for serving four people.
Monday, September 15, 2008
A simple soup that made my day!
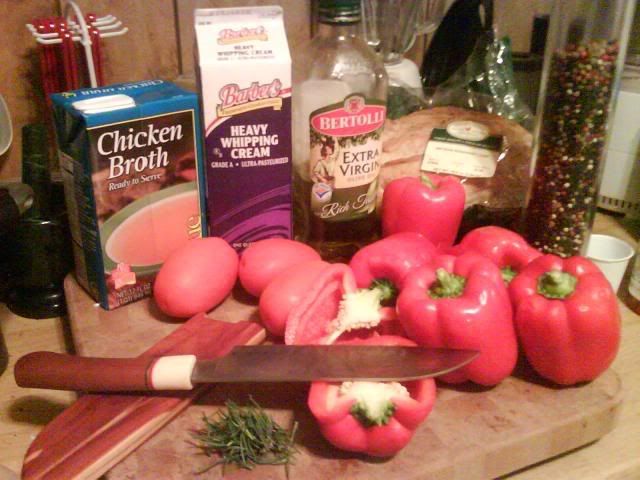
Made a red pepper cream soup with roma tomato and rosemary! Seemed like a good idea at the time because I am a gigantic sucker for rosemary in anything I can get away with putting it in. Red peppers always seem to be complimentary, and my wife's favorite dish I cook is a pasta that uses both to huge effect for a pesto, but we'll talk about that one at a later time ;)
Anyway, time for a creamy, but bright and sunny little soup thats really easy to make, provided you have a beaucoup stash of peppers.
Basically split open at least a half dozen red peppers, get the seeds out, drizzle a little olive oil and add fresh rosemary and ground peppercorns, then cook that in the oven on 350 for 30 minutes.
When that's out, unpeel the skins from each pepper half and toss into the food processor with a roma tomato and liquify the hell out of it. Add that to 16 ounces of chicken stock, a teaspoon of salt, set it on medium heat, then add a half cup of heavy cream when it's hot.
Garnish with a rosemary sprig, and I served with rosemary artisan bread. Did I mention I love rosemary way too much?
I was pinching bits of bread and putting them in and the brisk little bursts of that sticky little herb just exploded on my taste buds. With a cool glass of mint tea to fly wingman, this was a really good meal for as little effort as it demanded!
Sunday, September 14, 2008
A Pillar...of Salt???
For any Christian readers of mine, remember this old chestnut from the Old Testament?
A five pound "pillar" of pink himalayan salt! My good buddy Dino Sarma at Alternative Vegan gave me the hookup on this really interesting bit of kitchen equipment. Apparently its really good for stuff like carpaccio and sashimi, and anything with a wet base that will be complemented by picking up the lovely mineral-rich himalayan salt on the surface. Being vegan-minded, Dino was sure to also let me know about using it for cucumber spreads, and also giving a unique arrangement and hint of flavor for fruits, and even a good way to breathe life into raw veggie platters. Thanks Dino, you're the man :)
Then the Lord rained upon Sodom and upon Gomorrah brimstone and fire from the Lord out of heaven;I couldn't help think a little about that when I got my latest weirdo acquisition:
And he overthrew those cities, and all the plain, and all the inhabitants of the cities, and that which grew upon the ground.
But his [Lot's] wife looked back from behind him, and she became a pillar of salt.
-- Genesis 19: 24-26 (KJV)
A five pound "pillar" of pink himalayan salt! My good buddy Dino Sarma at Alternative Vegan gave me the hookup on this really interesting bit of kitchen equipment. Apparently its really good for stuff like carpaccio and sashimi, and anything with a wet base that will be complemented by picking up the lovely mineral-rich himalayan salt on the surface. Being vegan-minded, Dino was sure to also let me know about using it for cucumber spreads, and also giving a unique arrangement and hint of flavor for fruits, and even a good way to breathe life into raw veggie platters. Thanks Dino, you're the man :)
Falafel, Tzatziki, and Mutabbal - An Arabic Feast!
I made me some falafel!
Here's how you can do it too!
Use this crap:
1 15 ounce can of garbanzo beans (chicpeas) OR an equivalent amount of raw that have been soaked and cooked previously
1 onion
1/2 cup fresh parsley
1 cup bread crumbs
2 cloves of garlic, chopped
1 egg
2 teaspoons cumin
1 teaspoon ground corriander
1 teaspoon fine ground kosher salt
1 teaspoon olive oil
1 teaspoon lime juice
1/2 teaspoon cayenne pepper
dash of pepper
rice flour (for coating)
sesame seeds (for coating)
oil (for frying - I use canola)
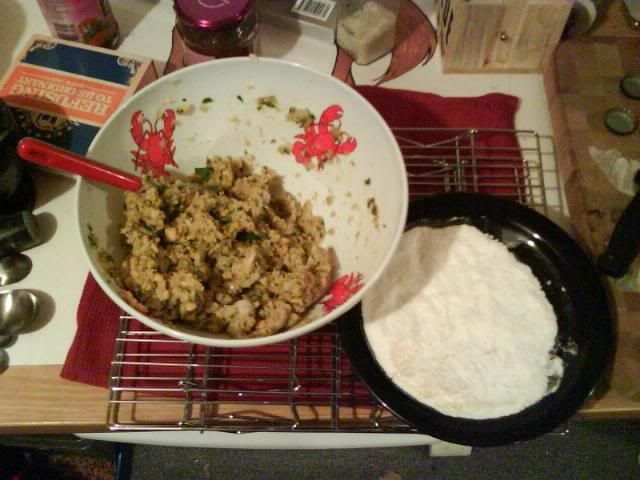
Take your chicpeas in a bowl and mash the hell out of them with your big meatfists! Leave no chicpea unmolested! No, but seriously, get them good and mooshed up. Take a food processor and zip the onions, parsley, and garlic, adding to the mix. In a separate bowl, mix an egg, cumin, corriander, salt, oil, lime juice, cayenne, and pepper, and stir until its a uniform goop. Add to main bowl and stir. It's going to be slick and sticky, so add a cup of breadcrumbs bit by bit. You may use more or less than a cup, the important thing is that your mix should be as dry as it can manage but still hold together.
Now in a separate small dish, pour some rice flour and sesame seeds, and spread them around.
You should have a mess that looks like this:
Take little balls of dough about the size of a golf ball, flatten them slightly and press them into the rice flour and sesame seed mix before you lay them on a cookie sheet or whatever. Once all the balls are formed and dusted, put the tray or sheet in the fridge for about 30 minutes so they can cool and set a bit.
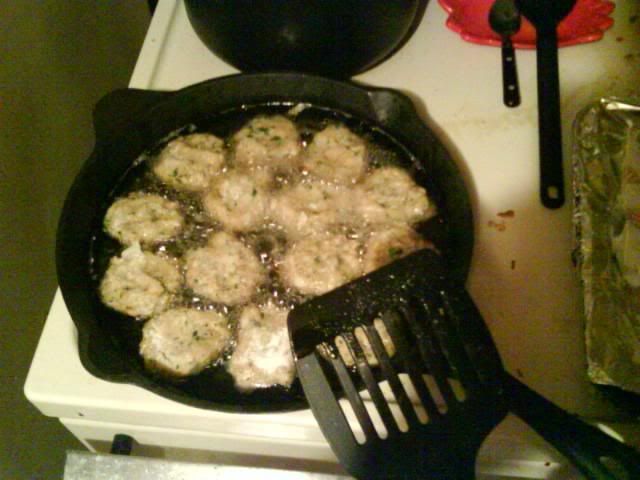
While you're doing that, prepare your frying implement. I prefer to pan fry in a cast iron skillet, but you can do as you wish. Once your oil gets good and hot, drop those babies in!
It'll take a bit to get a good cooking, so be patient. Check the sides occasionally, flip when you must, and drink a beer. Relax.
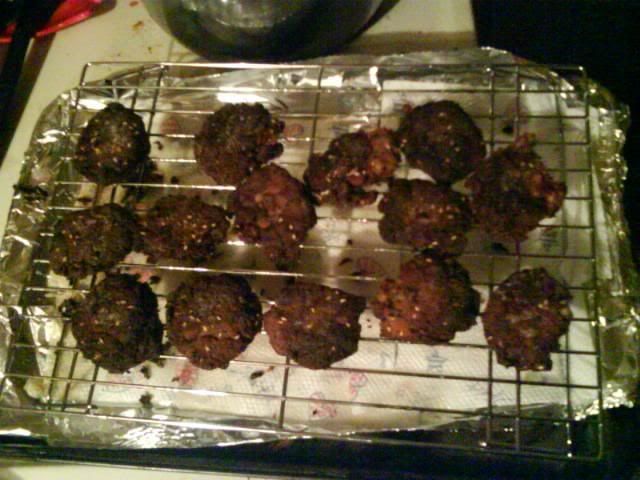
Eventually they will be done. If you have a cooling rack, I highly recommend you use it to put these on. It'll drain excess oil and make it taste so much better. When you put the falafel patties on the rack, try adding a little pinch of finely ground kosher salt to each one. It makes it taste absolutely divine!
Now, I also made some tzatziki for this, which was pretty easy too. Here's what you'll want:
1 cup regular plain yogurt (don't buy that low fat crap )
2 teaspoons dill weed
1/2 cucumber, peeled and seeded
1 tablespoon tahini
Kosher salt and pepper to taste
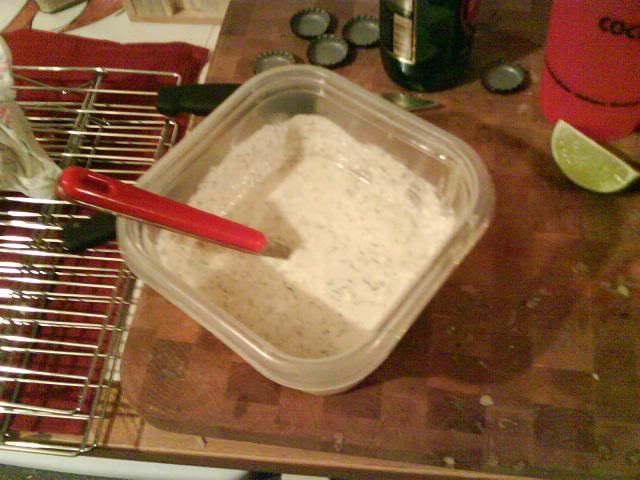
Take the cucumber and run it through the food processor. Should end up with something akin to applesauce. Strain as much water as you can from this slop, and add it to a cup of yogurt. Add in dill weed, salt, pepper, and tahini. Stir.
Easy, huh?
I also made mutabbal, which is a dip that is very similar to baba ghannouj, if you've had that. I've heard some people call baba ghannouj mutabbal, and mutabbal baba ghannouj. The way it's been explained to me is that mutabbal generally has more tahini, but I've seen baba ghannouj recipes with as much as I used, so who knows.
I started eating this about a year ago, when a local shop near my work had opened up. They had great hommous, but I always kept coming back for this. It's got a very rich, smoky flavor, and goes great with pita or any flatbread.
Here's what you need:
Eggplants! (3 medium-ish ones or 2 large ones)
Tahini - 3 tablespoons
Juice from one lime
Tablespoon of olive oil
2 cloves of garlic, crushed
1 chili pepper, finely chopped
Kosher salt, to taste
Wood chips (for smoking on a grill)
Foil
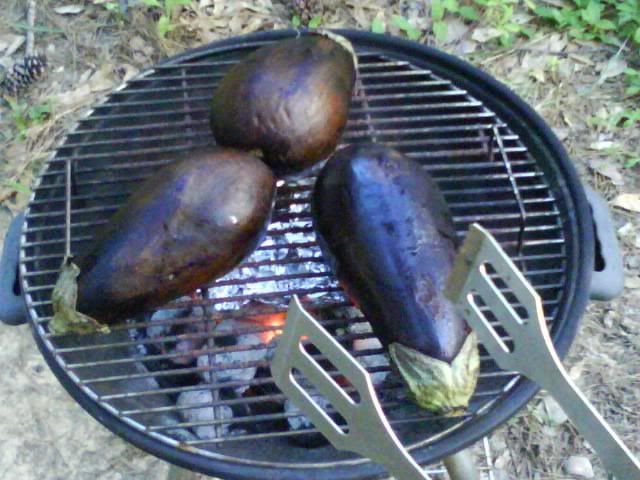
First off, grill your eggplants. If you have a gas or charcoal grill, do what you can do get it ready to grill on a low/medium heat. Once that's done, take two handfuls of wood chips and put them in a pouch made from aluminum foil. Poke holes in that pouch so that smoke can get out. When you're ready, put that over the coals or element or whatnot, and then put your eggplants on.
I used hickory chips because thats what I had, and I love hickory smoke. Consider this arabic food with a southern accent ;)
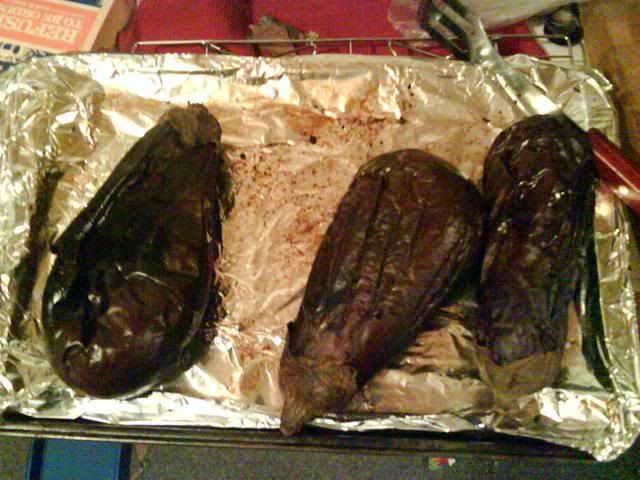
Cover that and cook for 30-45 minutes, or until your eggplants get a general level of prunage. They'll start to look very wrinkly. Check back every 10 or so minutes and flip when necessary. Expect the skin to crack, tear, and maybe burn a little. That's okay.
When you're done, they should look something like this:
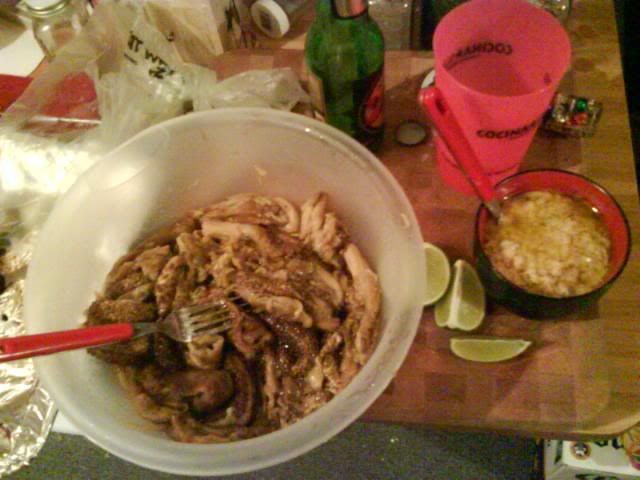
Now, let them cool for a good 25 minutes or more, and get a bowl or dish or something. Cut the eggplant heads off and then gently squeeze the lovecraftian nightmare that is the eggplants gross-looking innards into that bowl. Eeeewwww!
This picture does no justice, it looked like a monster I was scared.
Take this abomination and put it into a collander, giving a good press to get as much moisture out as possible before returning to your bowl.
Combine the other ingredients into a separate bowl and stir until its a uniform slop, then pour that into the other bowl. The picture above shows that bowl to the right. I'm sure you figured that out already.
From here, it's up to you. If you like traditional mutabbal, you can mash apart the ghastly pulp until its a good stringy mush. This results in a good and chunky dip.
I myself prefer it the way I was introduced to it, which is more of a refined dip. To that end, I used a blender on the mix setting to get a more uniform consistency, without it being runny. As with most dips from the Levant, it's usually dressed up with olive oil drizzled on top and some other garnish. For mine, I added pine nuts and a little dash of cumin.
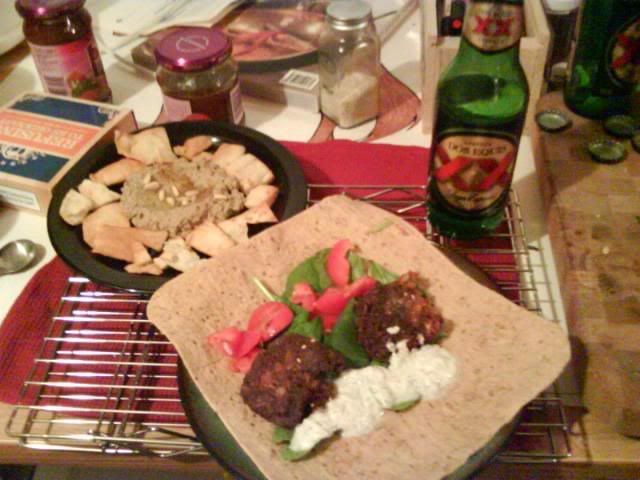
Here's the final result, served with the aforementioned very very delicious falafel & tzatziki in an italian herb flatbread with a Dos Equis & lime.
Dos Equis and lime, you may gnash your teeth at me, and ask how I dare to defile the authenticity of this meal. To that, I say eat me, because this beer is delicious and I've been drinking it all day when I was grilling!
Subscribe to:
Posts (Atom)